> For the complete documentation index, see [llms.txt](https://vezolve.gitbook.io/activebooks/llms.txt). Markdown versions of documentation pages are available by appending `.md` to page URLs; this page is available as [Markdown](https://vezolve.gitbook.io/activebooks/crm/sales/appointment.md).
# Appointment
Appointment document type can be used to schedule and manage interaction with a [Lead](https://docs.erpnext.com/docs/v13/user/manual/en/CRM/lead) or an [Opportunity](https://docs.erpnext.com/docs/v13/user/manual/en/CRM/opportunity).
To access Appointment list, go to:
> Home > CRM > Sales Pipeline > Appointment
### 1. Prerequisites[ ](https://docs.erpnext.com/docs/v13/user/manual/en/CRM/appointment#1-prerequisites)
1. [Appointment Booking Settings](https://docs.erpnext.com/docs/v13/user/manual/en/CRM/appointment-booking-settings)
2. [Holiday List](https://docs.erpnext.com/docs/v13/user/manual/en/human-resources/holiday-list)
3. [Employee](https://docs.erpnext.com/docs/v13/user/manual/en/human-resources/employee)
4. [Lead](https://docs.erpnext.com/docs/v13/user/manual/en/CRM/lead)
5. [Email](https://docs.erpnext.com/docs/v13/user/manual/en/setting-up/email/email-account)
### 2. How to create an Appointment[ ](https://docs.erpnext.com/docs/v13/user/manual/en/CRM/appointment#2-how-to-create-an-appointment)
1. Go to Appointment list, click on New
2. Select scheduled time of the appointment
3. Enter customer details
4. In linked documents, if you have already created a Lead for the Customer you can set it here. Otherwise the system will automatically create a new lead with the customer details from previous step.
5. Save. 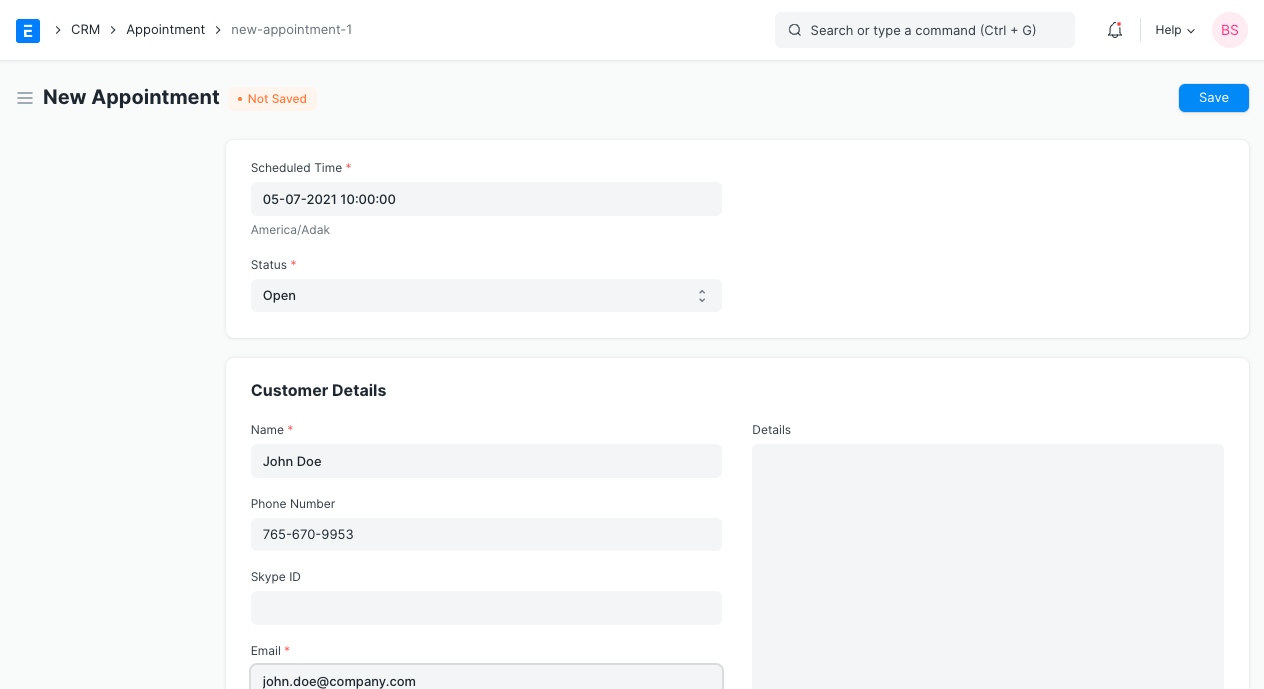
#### 2.1 Creating appointments via website[ ](https://docs.erpnext.com/docs/v13/user/manual/en/CRM/appointment#21-creating-appointments-via-website)
Your Customers/Leads can create appointment using the webpage `yoursitename.com/book_appointment`.
First they need to set a date, time. 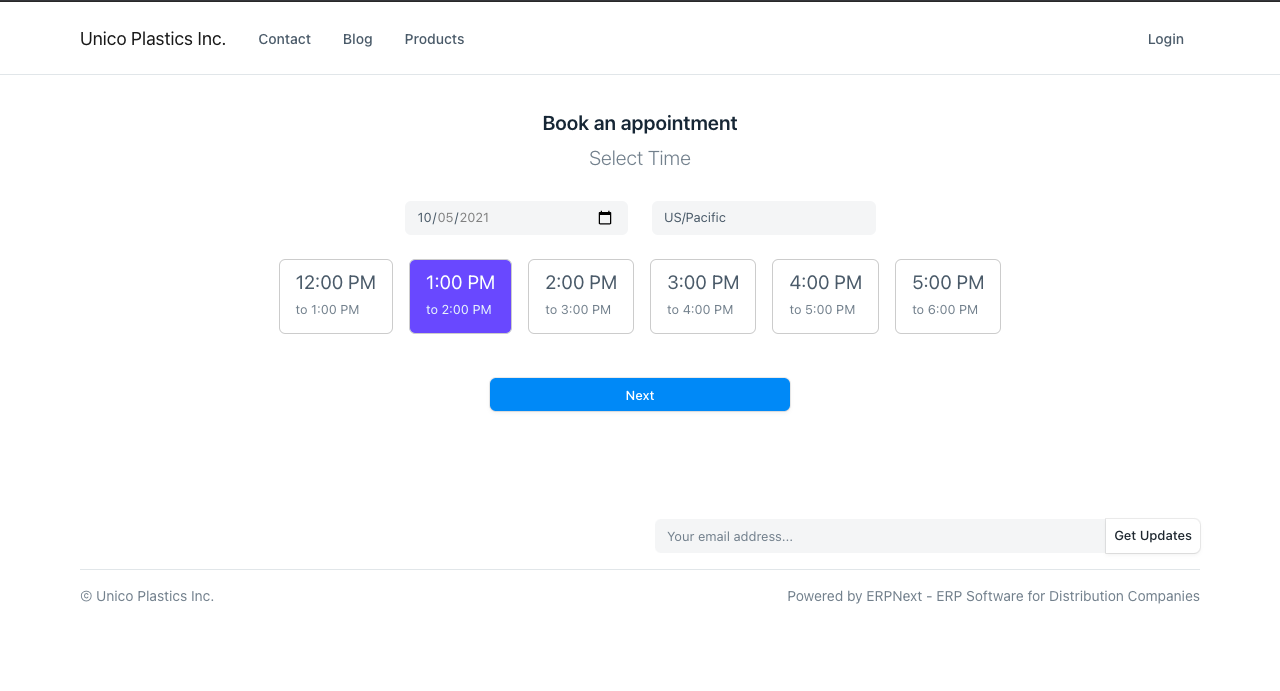
Then, add more details: 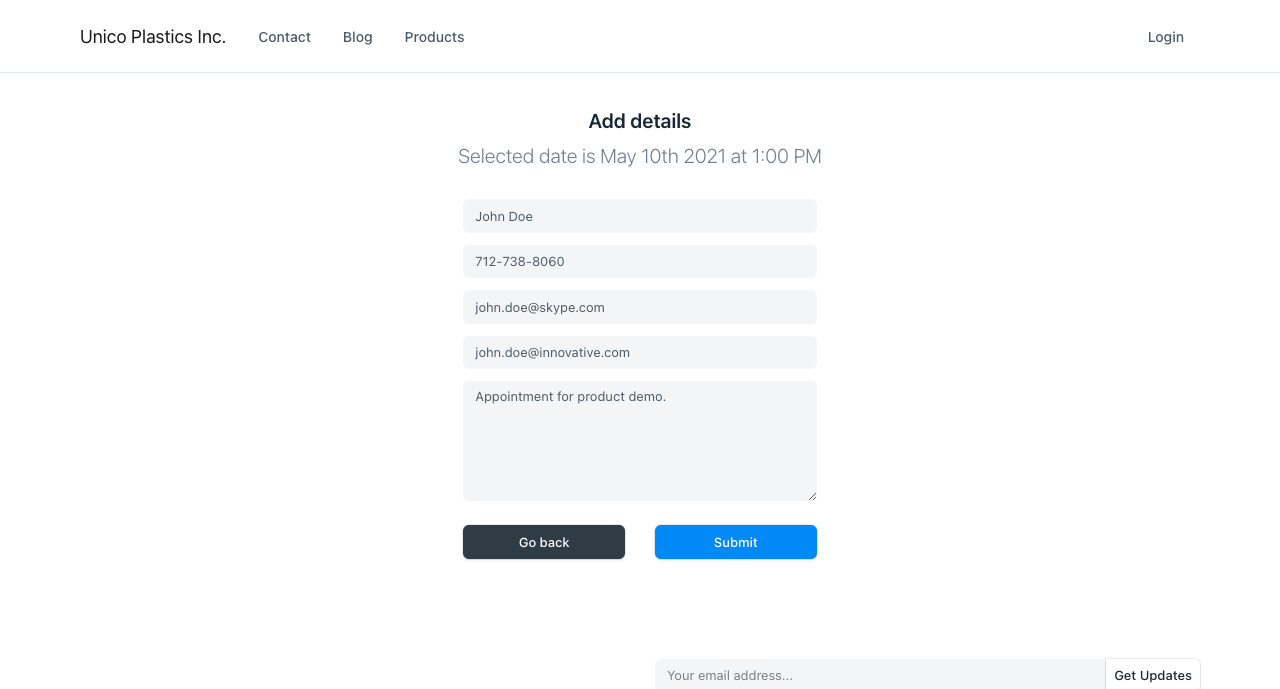
It'll match the customer email with leads in the system and if one is found, it is linked with the document. If no lead is found, the appointment is marked as "Unverified" and an email is sent to the customer to confirm their email
### 3. Features[ ](https://docs.erpnext.com/docs/v13/user/manual/en/CRM/appointment#3-features)
#### 3.1 Autoassign[ ](https://docs.erpnext.com/docs/v13/user/manual/en/CRM/appointment#31-autoassign)
Appointments are automatically assigned to employees as per the `Agents` list in [Appointment Booking Settings](https://docs.erpnext.com/docs/v13/user/manual/en/CRM/appointment-booking-settings). The agent with the least number of assignments for the day of the appointment and who is free in the scheduled time is assigned to the appointment.
#### 3.2 Email confirmation[ ](https://docs.erpnext.com/docs/v13/user/manual/en/CRM/appointment#32-email-confirmation)
If there is no matching lead in your system, an email will be sent to the email address in the appointment to confirm if the email address is valid. Upon confirmation, a new Lead will also be created in the system along with the Appointment.